You jump on your riding mower and turn the key. All you hear is click…click…click. It won’t turn over and start. Most likely you will find the problem lies with the electrical or charging system.
A riding mower clicks but won’t turn over when the starter solenoid is bad; the battery cables or wiring are corroded or loose; the ground wire is bad; or the battery is weak or not holding a charge. When these items are in good working condition and your riding mower still won’t start, a bad starter motor may be at fault.
Reminder: Always disconnect the negative cable (black) from the battery before making any repairs to the electrical system. Follow all safety precautions outlined in your model’s operators manual.

This post may include affiliate links. Purchases made through these links may provide a commission for us, at no extra cost to you. As an Amazon Associate, we earn from qualifying purchases.
Follow all safety instructions provided in your equipment operator’s manual prior to diagnosing, repairing, or operating.Consult a professional if you don’t have the skills, or knowledge or are not in the condition to perform the repair safely.
This is Why Your Riding Mower Clicks But Won’t Start or Turn Over
Damaged or Loose Battery Cables, Wiring & Terminals on the Riding Mower
The cables can loosen over time along with the wiring on your riding lawn mower. Check the cables to the battery, the wiring from the battery to the solenoid, and the wiring for the solenoid to start.
Make sure they are in good condition and securely in place making a good connection.
Solution: If you find any corrosion on the wiring or terminals, disconnect the battery (remove the negative cable first) and use a baking soda bath to remove the corrosion and clean them up.
This baking soda mix consists of 2 cups of water and 3 heaping tablespoons of baking soda. This mix with a wire brush works well.
If the terminals or wiring are bad, go ahead and replace them with new ones. Add a dielectric grease to help to minimize further corrosion.
If you find your cables keep coming loose or are broken, they need to be replaced. Bad cables can contribute to a bad battery and starting problems.
Bad Ground on the Riding Lawn Mower
You may have a bad ground on your riding mower that is affecting its ability to start. Check the black cable from the battery to the frame of the riding mower.
Check the ground from the solenoid. (A 3-post solenoid is self-grounded). Remove any corrosion you find and make sure it’s making good contact.
Solution: Replace a damaged cable coming from the battery to the frame. Remove any corrosion found for the grounds from the battery and the starter solenoid.
Bad or Weak Battery on a Riding Lawn Mower
A weak battery or one that won’t hold a charge won’t provide enough power for your riding lawn mower to start. It will just click and not turn over.
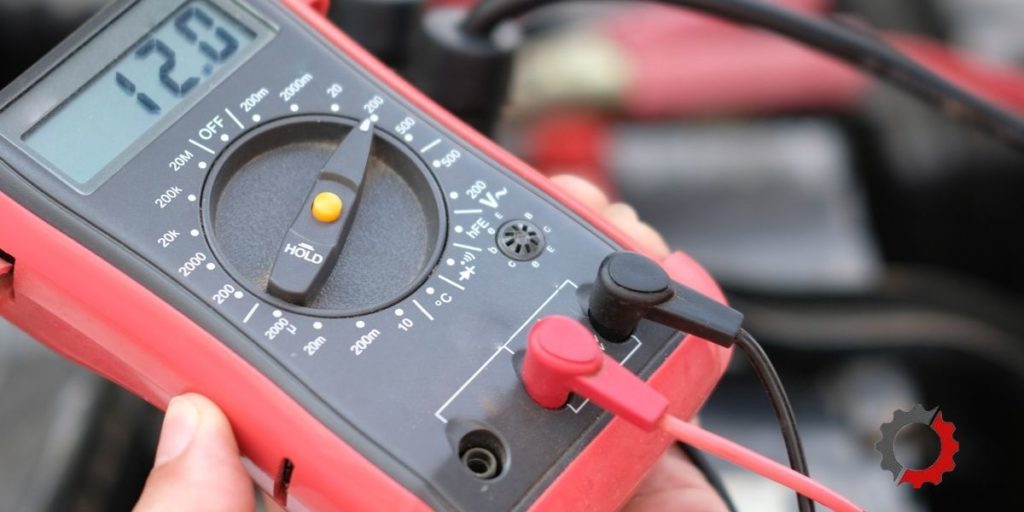
Check the voltage of a riding lawn mower battery
Use a multimeter’s red and black prongs and touch them to the corresponding colors of terminals on the lawn mower battery. The most common type of riding lawn mower and zero-turn lawn mower batteries have a voltage of 12 volts.
You may get a voltage reading between 11.5 and 12.7. A reading of 11.5V indicates a battery that is almost dead while a 12.7V reading indicates a fully charged battery.
Charge a riding lawn mower battery:
- Put on your safety gear so your eyes and skin are protected from acid or electrical shock.
- Get access to the battery and its terminals. You may need the screwdriver to uncover the lawn mower’s body to get access to the battery or battery casing.
- Leave the battery in its casing with the terminal cables attached.
- Connect the charging cables starting with the positive red first (The one with the plus sign on it)
- The red cable clamp goes onto the positive terminal, and the black cable clamp goes on the negative battery terminal.
- Make sure that your skin only touches the rubber coating of the charging cables and clamps.
- Set the charger’s voltage level and amp level to the desired level. The average volt level for lawn mowers is usually 12 volts. More amperage charges the battery faster (Start with two amps and work up to no more than 10 amps).
- If your charger has a battery charging gauge, keep the charger connected until the battery is fully charged.
Solution: When the battery is weak, use a battery charger to charge it. If you find the battery will no longer hold a charge, it’s time to replace it with a new one.
A battery that dies and is able to be charged may indicate you have a problem with the mower’s charging system. See the information on the charging system below.
Bad Starter Solenoid on the Lawn Mower
When your mower keeps clicking, a likely cause is a bad lawn mower starter solenoid. The solenoid acts like an on-off switch. It is an electromagnet switch that is actuated to engage the starter motor so the engine will turn over.
Most starter solenoids are mounted on the starter. However, they do not have to be to still work. Follow the positive wire from the battery to find the solenoid on your riding lawn mower.
There are many reasons why a starter solenoid can go bad. The internal spring can become weak or the copper plate can start to corrode. A bad ground, weak starter, or bad battery can also result in the starter solenoid failing.
Solution: Test your riding mower starter solenoid. You’ll need a volt-ohms meter, screwdriver, continuity light, and some wrenches. Follow the instructions found in “How to Tell Your Lawn Mower Solenoid is Bad“. If you are able to start your mower by bypassing the solenoid, it must be replaced.
Bad Starter Motor on the Lawn Mower
Once you have ruled out the battery, cables, wiring, ground, and starter solenoid as being the reason for your riding mower clicking but not turning over, it’s time to look at the starter. The starter can be removed and tested.
I recommend having your local repair shop that specializes in starter and alternator repairs test your starter and rebuild it if possible before just throwing a pricey new starter at your riding lawn mower.
Related Topic:
Bad Riding Mower Charging System Causes A Battery to Drain
Your riding mower has a charging system to keep the battery charged. When it isn’t working correctly, the battery will become weak and fail to start your mower. Depending on the size of your riding lawn mower, it may have an external alternator like the one you find on a car.
It may also have an internal one located under the flywheel. Most lawn mowers will have an internal alternator. Perform the steps provided here to check the charging system using a volt-ohms meter.
If you find your riding mower is no longer charging the battery, I recommend having a mechanic familiar with your charging system perform further tests and necessary repairs. Troubleshooting the exact cause of a charging system can be quite difficult.
If you’re not familiar with the charging system, you will probably just end up throwing parts at your mower. This can get very expensive, especially since if you get it wrong, you can’t return an electrical part. You could be looking at a bad stator/alternator, regulator, or other electrical problem.
Still Having Problems With Your Riding Mower?
As a lawn mower owner, when you own it long enough, you are going to run into different types of problems. This may include problems where your riding mower is smoking, cutting uneven, losing power, not starting, leaking fuel, and more.
Check out this handy guide including charts for common riding mower problems and solutions:
Common Riding Lawn Mower Problems & Solutions.
If you are unable to fix your riding mower or don’t want to attempt a more complicated repair, have your local lawn mower dealership or repair shop for assistance.
