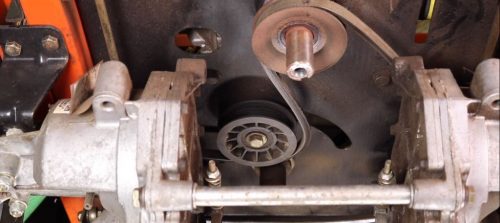
When you begin to notice squealing noises coming from the front of your Husqvarna zero-turn mower, probably your drive belt is failing. Perhaps your AC and power steering are also not working. Well, it’s time to replace your drive belt.
How to Replace a Husqvarna Zero-turn Mower Drive Belt
The drive belt is the part of your ZTR that operates the cutting blade. It is usually wrapped around a series of pulleys located on the top of the deck. This component has a vital role to play in ensuring your zero-turn’s overall performance. Therefore, it must be checked and maintained regularly, as needed. If neglected, it may malfunction.
A malfunctioned drive belt causes the mower to move slowly, and in the worst-case scenario, your ZTR doesn’t steer at all.
But the thought of having to replace your Husqvarna’s deck belt is daunting, especially if you like to do things yourself. The user manuals are mostly too lengthy and can be quite challenging to follow.
Luckily, below I’ll share an easy-to-follow guide on how to replace the drive belt on a Husqvarna zero-turn mower. But first, let’s have a quick look at the signs that you need to change your deck belt.
Signs That a Zero-turn Mower Deck Belt is Faulty
Here are the common signs that your z-turn mower’s deck belt is faulty and needs replacing.
Cracked Deck Belt
A belt with cracks will not go long before it breaks. Why wait until it’s too late? Replace your drive belt as soon as you notice shallow cracks on it.
Burned Sidewalls
Does the drive belt edge that touches the pulley look burned, shiny, or glazed? That’s a sign that its life has come to an end. It’s time to get a new one.
Worn-out Belt Edges
Ideally, the edges of your ZTR mower deck belt should be even and smooth. If there are uneven sections of your belt, then it needs to be replaced.
After 100 hours of Service
Husqvarna recommends that you replace your drive belt every 100 hours.
How to Remove the Drive Belt on a Husqvarna Zero-turn Mower

Follow these easy steps to remove the drive belt on a Husqvarna zero-turn mower.
Step 1: Prepare your Husqvarna Z-turn Mower
When replacing any Z-turn mower component, always begin by parking the ZTR on a level surface. Next, apply the parking brakes and disengage the spark plug wires.
Step 2: Remove the Left Belt Shield
Position your z-turn mower’s deck into its lowest cutting setting. The drive belt hides behind a belt shield, which is usually secured using bolts. Remove these bolts to expose your drive belt.
Wipe away any grass, dirt, or debris that may have accumulated on the desk surface and belt shield. At this point, you may need to look for an extra hand to proceed with the rest of the process.
Step 3: Release the Tension on the Blade Belt
Push in the spring-loaded idler pulley to release any tension on the drive belt.
Step 4: Remove the Blade Belt
Remove the belt by rolling it over the housing of the cutter’s pulley system. Do so carefully, and be keen not to move it over the pulleys as this may damage the blade belt. Unfasten the belt keeper. Now remove the deck belt.
How to Install the Drive Belt on a Husqvarna Zero-turn Mower
Follow these easy steps to install the drive belt on a Husqvarna zero-turn mower.
Step 1: Wrap the Belt Around the Clutch Pulley
Wrap the new mower deck belt (view on amazon) around the clutch pulley. The clutch pulley is the one on the mower’s engine crankshaft. Now encircle the deck belt on the spring-loaded idler pulley. Finally, attach the belt keeper in its initial position.
Step 2: Configure the Belt
Push in the idler pulley to loosen the pulley system. That will help to keep tension off the belt. Now wrap the deck belt around the rest of the pulley series. Please refer to the configuration decal on top of the mower’s cutting deck to ensure you’re installing the belt correctly.
Step 3: Double-check Your Belt’s Configurations
It is paramount that you install your new deck belt correctly. Thus, before you proceed with any other steps, double-check the placement of your belt to ensure everything is in its rightful place. It shouldn’t have any hard twists or knots. Once done, now gradually release the idler pulley to fasten the deck belt.
Step 4: Replace the Belt Shield
Replace the belt shield and footplate you had removed earlier and secure them well with their original fasteners.
In Conclusion
Removing and installing the deck belt in a Husqvarna zero-turn mower is not complicated. You can do it by yourself by following the above easy steps. Remember to replace the deck belt every 100 hours. Also, inspect it regularly to establish its condition and install a new one if worn-out, burned, or cracked.
