Jerking, screeching, and jolting are very common problems with self-propelled mowers and walk-behind mowers in general. The pulley system and drive belt on Husqvarna self-propelled mowers have a strong hand in managing the mechanism of the machine. While other parts of the mower do contribute to this issue, the easiest way to adjust the speed or fix anything relating to the manner of movement of a Husqvarna mower is by inspecting and adjusting the drive belt, which could get a lot handsy, to be honest.
So really, how does someone adjust a drive belt? Most of the time, the belts just need replacement. Other times though, it could just be a slip-up somewhere with how the belt is installed because you could have replaced the belt too soon to be having belt problems. Either way will require a step-by-step guide on how to successfully remedy your Husqvarna drive belt problem to avoid doing it the wrong way or costing you an amount for servicing.
Step-By-Step Guide For Adjusting Husqvarna Self-Propel Mower Drive Belt

If you are familiar with how pulleys and belts run, this would be a breeze. Otherwise, if you are new to this and just want to wing it as much as possible without initiating a calamity, this may be a fun ride for you. Buckle up!
Step 1: Turn Off The Spark Plug To Spare Your Fingers an Accident
It might be uncommon but the engine can start up when you’re all in full fix-problem mode, and it’s going to get ugly. Locate the spark plug of the machine and turn it off before you begin. It’s better to be safe than sorry.
Step 2: Tip The Mower To Rest on Its Right Front and Rear Tires
Lifting your mower to rest on the right tires is the best way to raise your machine for access to the belly where the drive belt, blade, and pulley family resides. It saves the engine carburetor from getting clogged with oil that would warrant locking and other problems. Make sure to tighten the oil cap to prevent leakage, or you could take advantage of the situation and properly drain the oil for replacement.
Step 3: Take Out The Blade and Spindle
Using cautious hands, unscrew the bolt at the center of the blade and detach it from the spindle pulley. It comes off quite easily if the bolt isn’t rusted. After the blade is out, wiggle the shaft from the spindle pulley attaching it.
Step 4: Remove The Plastic Protective Covers Encasing The Pulleys and Drive Belt
There are plastic covers encasing the pulleys of the Husqvarna mower. The covers serve as protection to avoid debris and dirt from getting into the pulleys of the machine and affecting the drive belt.
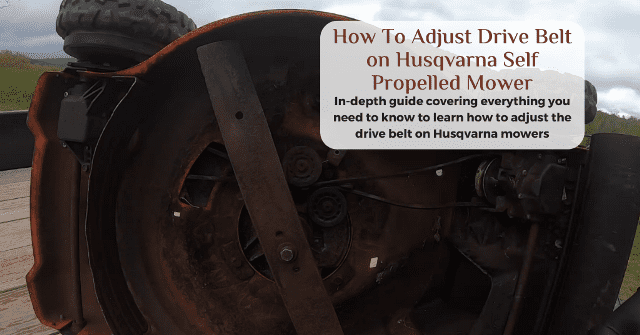
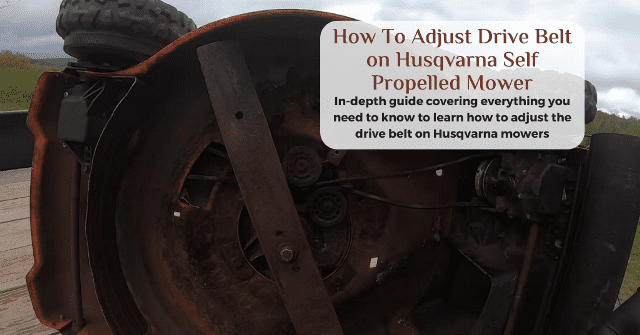
You will find protective covers at the forefront of the machine right above the front wheels encasing one pulley, at the underbelly of the mower encasing three pulleys including the spindle and blade, and one cover that serves as demarcation protecting the rear wheel pulley from the blade– all connected by the drive belt.
- The Front Wheel Pulley Cover
The bolts fastening the front pulley cover are right underneath it. All you have to do is unscrew the bolts and the top cover comes off.
At the middle of the cover where there’s the “H” sign, there’s a corresponding clip mechanism exactly where it sits but under the mower. You’ll find it like two tiny projections sticking out of the frame if you look under. Put your thumb and index finger on each and try to clasp them together to remove the small “H” plastic piece.
- The Blade Center Protective Cover
Four bolts are holding the cover in place; two of the bolts are right under the section of the front wheel and can easily be seen, and the other two are above the rear wheels right at the other side of the mower.
All you have to do is unscrew the bolts and take the cover out. You will be met with a lot of dirt if the mower has been on the run for a while, brace yourself.
- The Rear-Wheel Pulley Cover
This part is a lot trickier than the rest. First, you have to locate the bolts; you have one each underneath the rear tires and at the back of the mower covered by a plastic flap. All you have to do is twist each rear tire in a clockwise direction, and apply pressure on the axle to move the tire away to expose the bolt. Unscrew them and the cover comes off.
Step 5: Take A Picture or Memorize The Drive Belt Pattern For Reference
This is very important if you are new to fixing a drive belt or dismantling your mower. It helps you to make a good reference to avoid taking the wrong turns when you’re ready to assemble the parts.
Step 6: Proceed To Unwind The Drive Belt From The Pulleys
- Remove Belt From The Front Wheel Pulley
Start this step by unscrewing the safety case around the front wheel pulley. It looks like a little metal semi-circle plate with forks at the side stopping the belt from slipping off the pulley. Once you unscrew the bolt, it comes right off nice and easy, and then you can proceed to slip the belt off.
- Peel The Drive Belt Off The Blade Center pulleys
After this step, you strike the pulley trio at the blade center of the mower. Take out the pulleys one by one by unscrewing the bolts fastened in the middle of each pulley to free the belt. They come off quite easily releasing the dive belt.
- Finally, Slip The Belt Off The Idler Pulley at The Rear Wheel Side
Now that the demarcation is out you have plenty of room to access the drive belt wrapped around the idler pulley. Attached to the idler pulley arm is the tension spring that is responsible for tightening the drive belt to increase the tension required for the mower to run at an efficient speed.
Remove the tension spring from the idler arm and unscrew the nuts fastening the idler assembly to have access to the drive belt– and after that, the drive belt slips off.
Step 7: Insert The New Drive Belt
Here’s how to do this:
- Loop The Belt Through The Idler Pulley
To install the new drive belt, you simply go through the removal procedures but in reverse– starting with the rear-wheel idler pulley.
Wrap the belt around the idler pulley and attach the idler assembly. Do make sure to tighten the bolts properly to avoid having to dig back into your mower.
Attach the tension spring to the idler arm and tighten the grip.
- Revolve Around The Centre Pulleys
Reinstall the blade center pulleys and loop the belt properly at the right turns. This is where you refer to the picture you took earlier on step 4 if you’re unsure of the turns.
- Throw The Rest Of The Belt Over The Front Wheel Pulley
Chuck the end of the belt through the open gap to the front wheel pulley and place the belt properly in the pulley groove. After that, replace the metal safety frame and tighten the bolts with extra caution.
Step 8: Replace All The Protective Covers You Previously Took Out
All you have to do here is backtrace. Follow the steps you took to remove them to reinstall the covers in the right places. Also, make sure to tighten the bolts and screws with a little extra attention
Step 9: Reinstall Spindle Shaft and Blade
You can now replace the shaft you earlier removed. Use this opportunity to grease the spindle before doing so as this will help you take it out much easier than it would be if it weren’t greased. After this, you attach the blade and pat yourself on the back for a job well done!
How To Tell if Your Husqvarna Mower Drive Belt Needs Replacement

If you take a close look at your belt and notice loose fibers sticking out, then you need to change the belt. Usually, this can be weighed based on how badly frizzy the belt looks and you’d have to do this by eyeballing. However, if it gets frizzy enough that it’s bothersome to run your hand over it, then it needs to go and be replaced with a new one.
Some people will run it right back if they don’t see cracks and tears, but that is an awfully bad thing to perpetrate on your loyal Husqvarna self-propelled mower– please don’t do that.
What if The Drive Belt Isn’t Worn Out?
- Survey The Pulleys In Case Of Freezing
If your drive belt is intact, the problem could be from other compartments that revolve around the drive belt with the pulleys being the main culprits.
If one pulley gets frozen – meaning it gets rigid and refuses to rotate – this could easily throw off the mechanism of your mower; the pulley will overheat due to the friction induced by the drive belt rubbing against the groove (resulting in wear and tear of the drive belt) or will cause the drive belt to slip off.
- Check On The Tension Spring
Also, the tension spring can loosen up, which will affect the tension of the drive belt resulting in movement and speed malfunctions of your mower– You can easily tighten the spring to fix this problem.
- Tighten All Bolts and Screws
Due to the constant vibration of your mower, bolts and screws can wear out over time. This could make a bad impact on the plains to which the bolt is attached by widening the holes of the surfaces. A good routine check now and then will help the longevity of your mower and save you unforeseen problems.
At Last, The Summary!
Adjusting a Husqvarna self-propelled mower drive belt could mean many things. It’s either you completely replace the belt, inspect it for slip-ups or tears, or inspect the routes where the belt travels through.
It could be a long process depending on what you want to achieve and your experience, but it’s not at all difficult. You just need patience, a good understanding of your mower, and a good guide to refer to (like this article). Maybe a few ounces of elbow grease and a cold can of beer to keep calm. In the end, you’d find it to be quite an adventure.
